The QuickForm
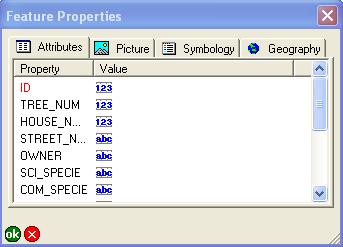
But one of the new features in ArcPad 7, leaves your average desktop GIS for dead! The QuickForm feature allows you to generate a data entry form based on a layers attributes, with basic rules and conditions to regulate data entry. This means that WITHOUT any programming, you can go from using the default attribute table for editing attributes:
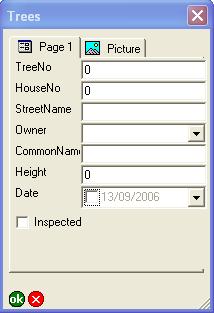
to a form with drop downs, check boxes and date pickers:
If you haven’t tried it yet – have ago! Here are the steps:
- Go to New > QuickForm.
- Your then prompted to select which shapefile you wish to build the QuickForm for. Choose your file and click OK.
- The first tab on the QuickForm dialog box allows you to select the layout of the form. There are settings for the name, style and size of the form, and number / type of tabs
- The second tab allows you to choose which fields will be available in your form. Not all fields have to be presented, you can check/uncheck as many as you like.
- The third tab allows you to set rules and constraints. You can nominate which fields are required, supply a minimum and/or maximum value for numeric fields, and add list values to be presented in a combo box for text fields.
- Click OK and you’re done. Next time you edit that layer the new QuickForm will be displayed.
Note that the QuickForm function overwrites any previous apl’s. If you need to make a change (and you don’t have ArcPad Studio) – you will actually need to create a new form (or for small tweaks – you could open the apl in a text editor and make the changes directly). Else, you CAN open and edit your QuickForm’s in Studio.
posted by Marika @ 16:38
![]()
![]()


 News Feed (Atom)

<< Home